Hi there!
So, trying to get all of the research done before producing anything just wasn’t working for me. Instead, I’m now going to produce and research simultaneously. This should help get something made, whilst also telling you why I’m doing what I’m doing.
Today, I’ve been working on a bit of file management (amonst other things that I’ll get to later), as I needed to add a vast array of assets into my shiny new project file. Now RPG Maker MV comes with an RTP (Run Time Package) that contains a variety of stock assets. They’re nice, but a bit too pixel perfect for what I have in mind. I’m a massive retro gamer, so I thought I’d create my game to be a sort of “Love Letter” to the games I grew up with. With that in mind, I happen to have access to some paid assets (that are available through RPGMakerWeb, STEAM, Itch.io, and even the Unity Asset Store!), by an artist called Jason Perry. I’ve been subscribed to his patreon for around a year and a half to two years now, and have previously bought licences to use his assets in both non-commercial and commercial projects (provided I give the proper in-credits reference). Jason’s “Time Fantasy” set is what I’m going to be using, as it is heavily inspired by SNES and GameBoy Advance style JRPG’s (which is exactly what I’m being inspired by!), so they’re beyond perfect for me. I may have linked to Jason’s work before, but I’ll do so again for good measure:
https://www.patreon.com/finalbossblues/posts
http://www.rpgmakerweb.com/a/rpg-maker-vxace-character/time-fantasy
https://assetstore.unity.com/packages/2d/characters/80-rpg-pixel-characters-48880
After digging all of the assets I have out of my backup drive (it’s over 4GB at this point!), I imported all of the visuals. I’ve done some Tileset Compositing as well, using the Patreon rewards I’ve been collecting to built a custom tileset. The tileset’s for a castle courtyard/grounds, as many castles weren’t just imposing fortresses, but were thriving hearts of the community. I took some screenshots of my Photoshop work for you:
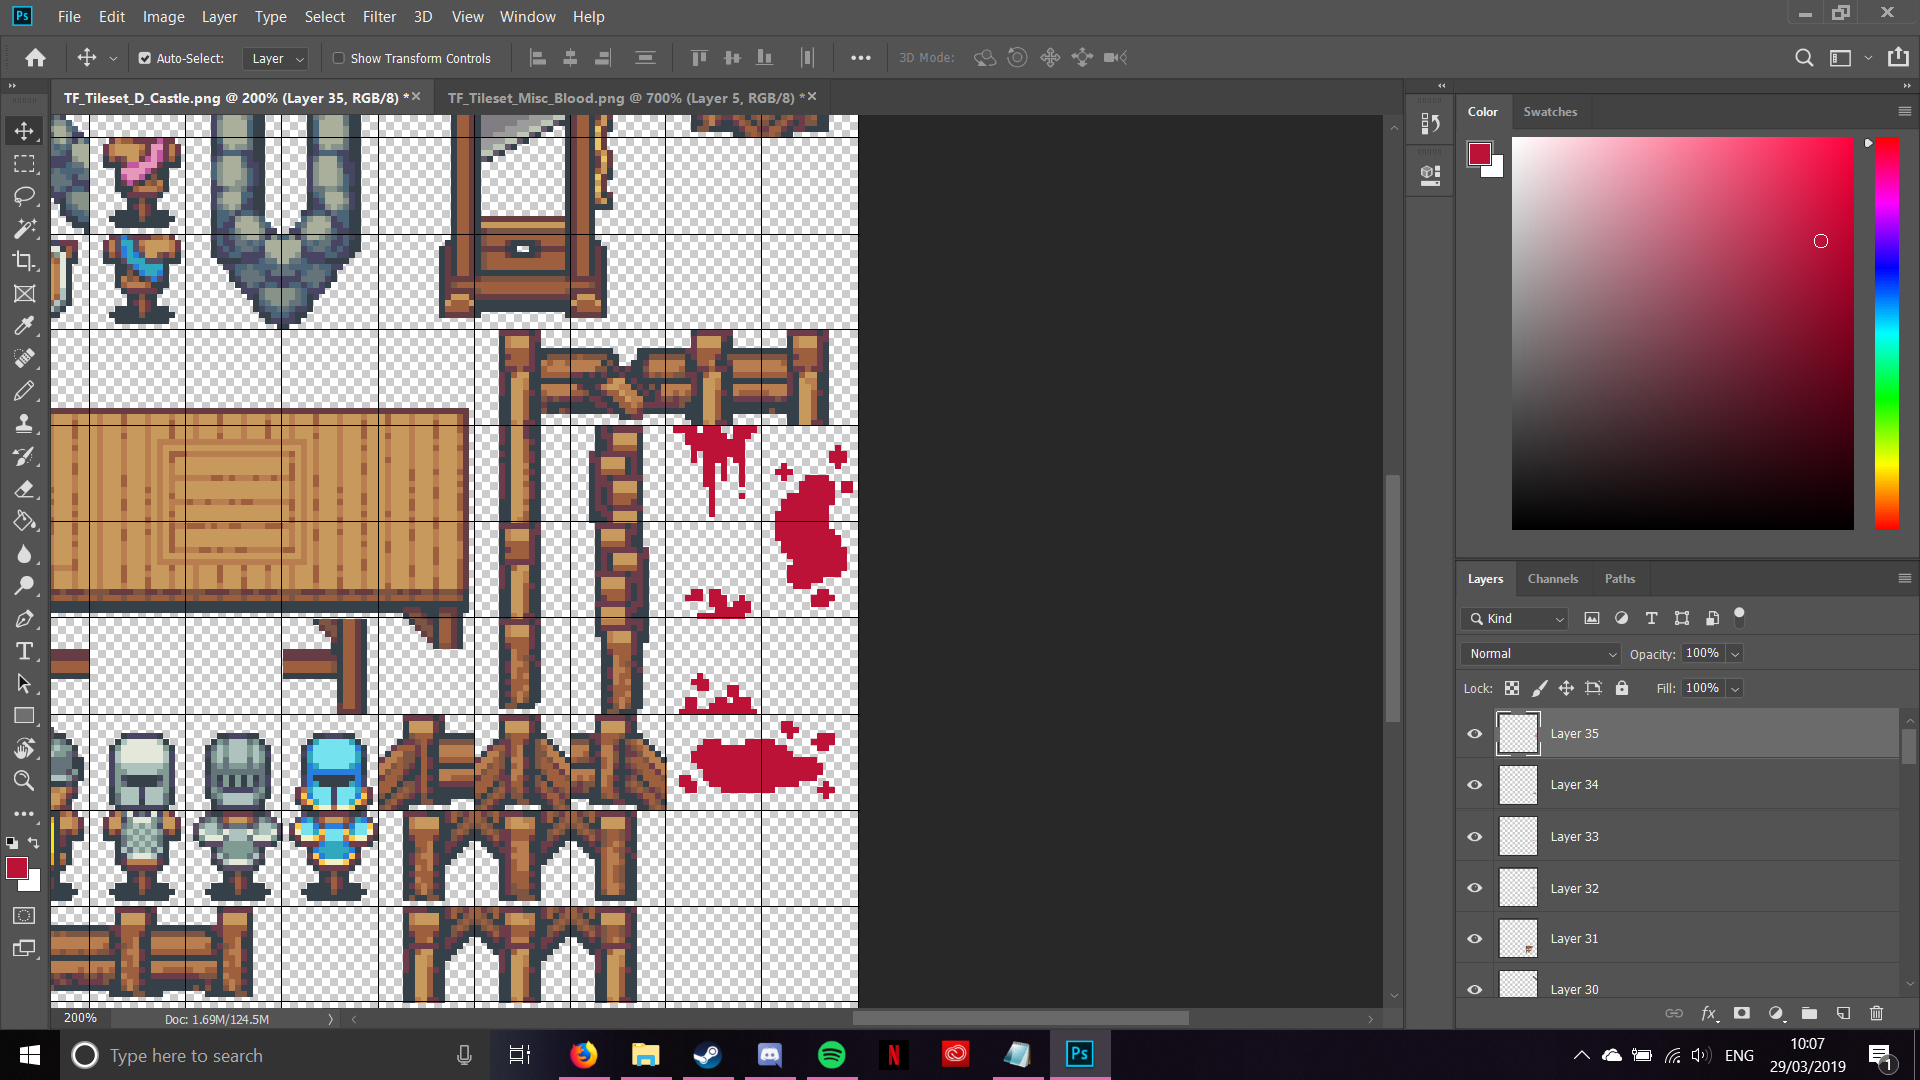
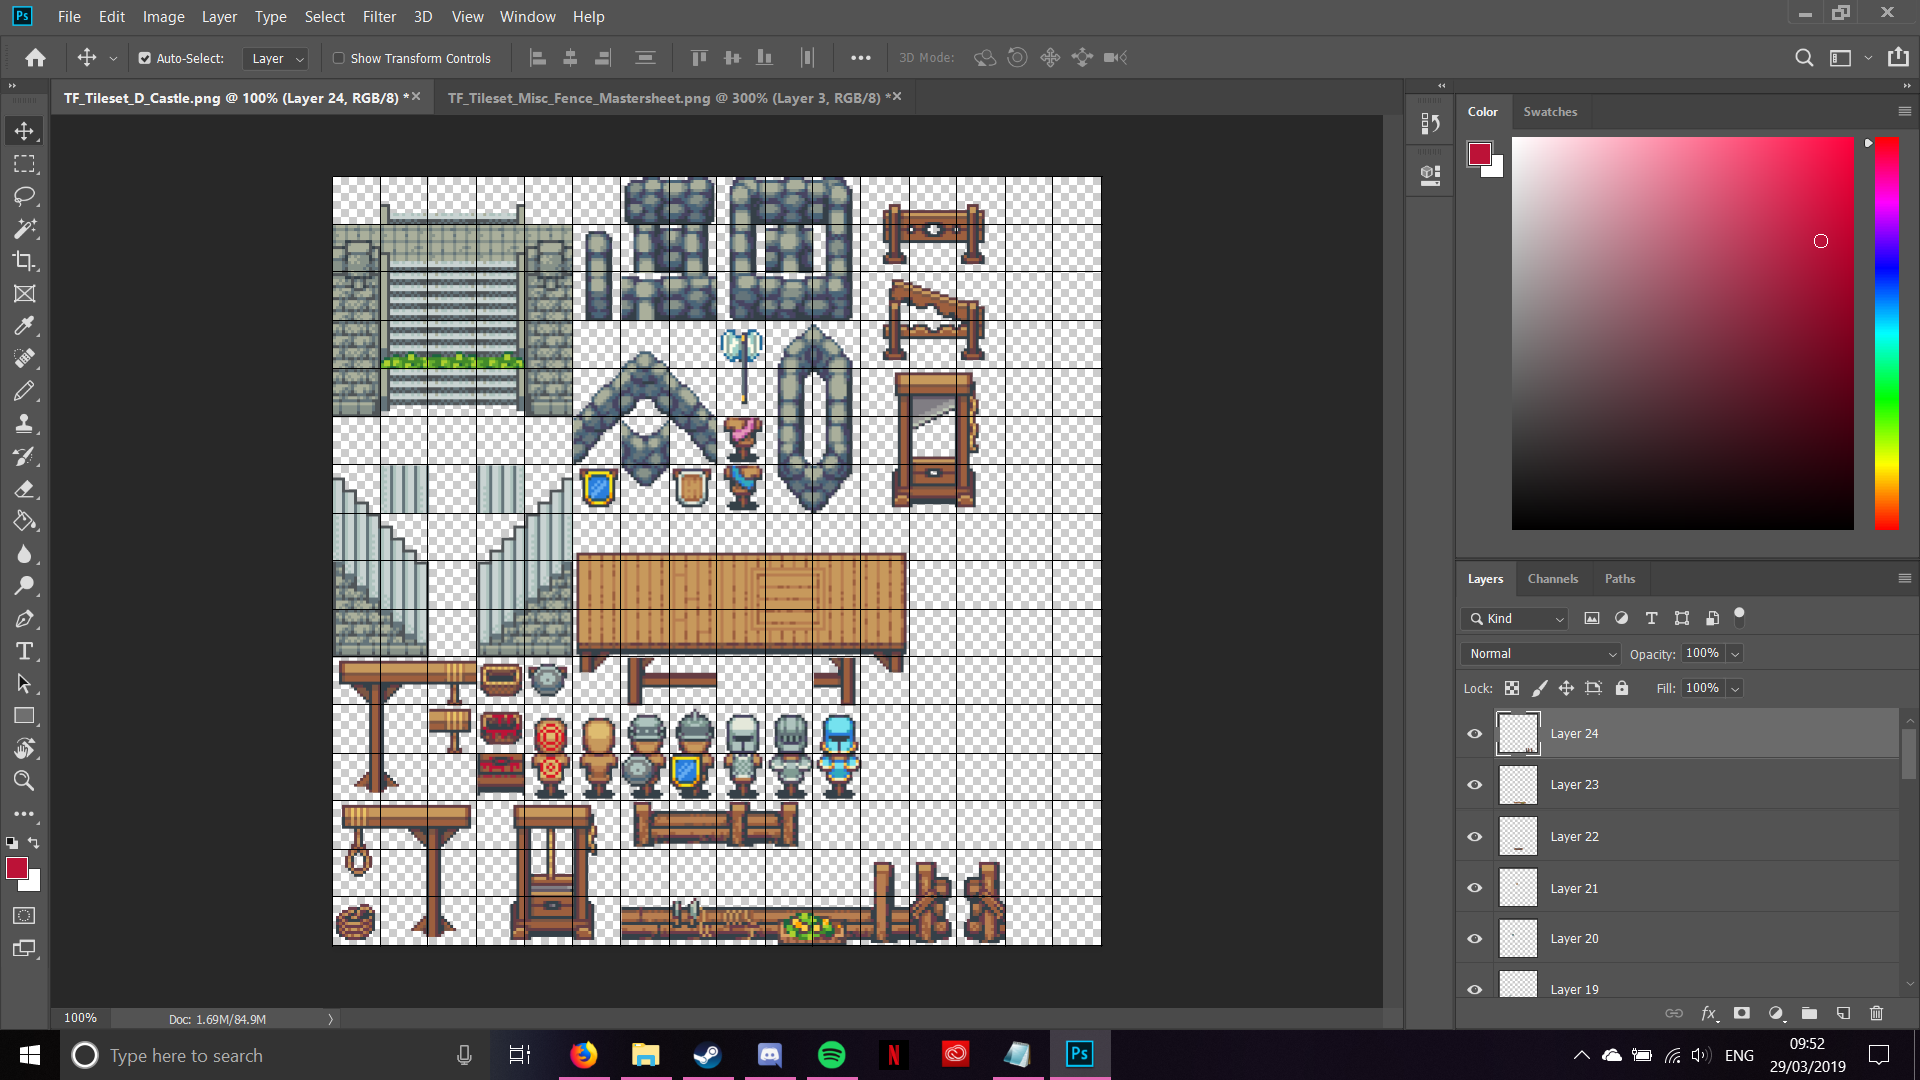
Although you can see some bloodstain images on the left, I had to remove them, as I’d forgotten to put in the wells (seriously, how would people drink water without wells?). This was over 30 layers of work in the end, as each section was placed on a seperate layer for easy swapouts and editing (I felt like I was going a bit mad!). I did export it, and even imported it into the engine. It works, even though it’s a bit cramped. I’m going to spend some time at some point composting a load of the Patreon reward tiles into functional tilesets for use.
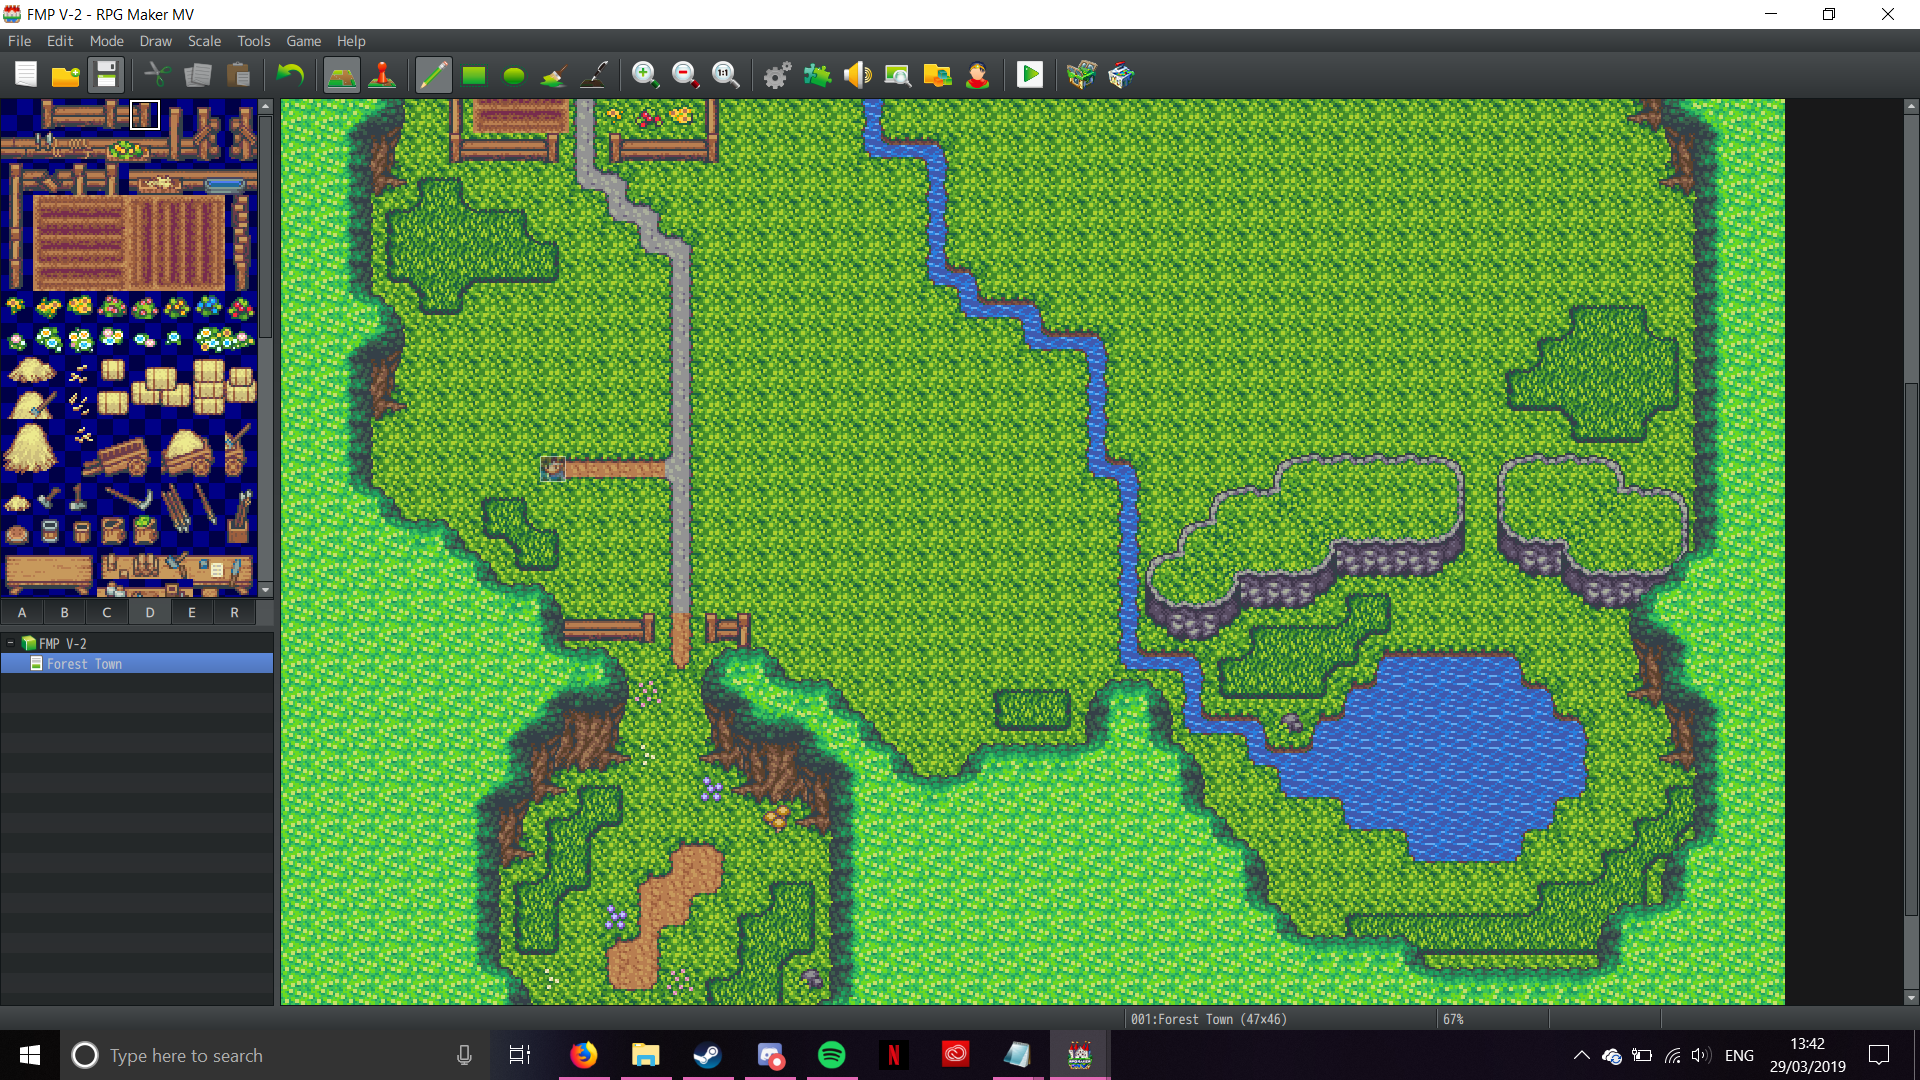
Speaking of using tilesets, I did some conceptual ideas on a woodland village that’s been rattling around in my head for about a week now. Now, as it’s been a while since I did any RPG Maker MV mapping, I decided to look at the pre-built sample maps for something to work from. I looked at the one that comes with MV, but I didn’t like it very much. Luckily, I also have a licence for it’s predecessor; RPG Maker VX Ace. I’d spent time over last summer converting the sample maps from VX Ace into MV, so I could have a browse at it’s samples library. I found something that suited my needs in the “Forest Town” sample.

RPG Maker MV – Sample Map “Forest Town” 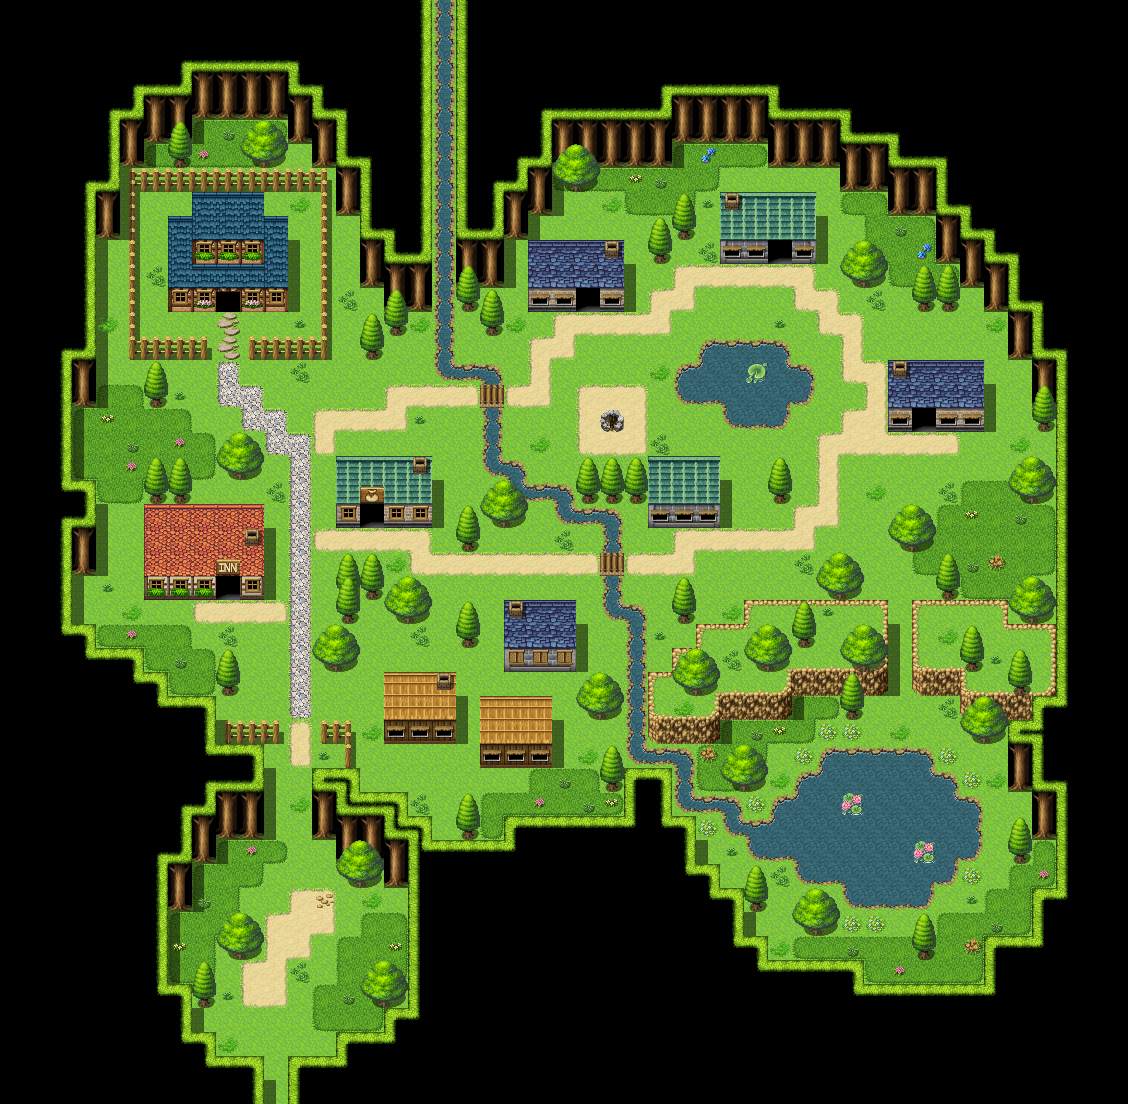
RPG Maker VX Ace – Sample Map “Forest Town”
As I’m only testing tilesets at this point, I’m not too concerned about using samples (they’re there to be used, aren’t they?), and I had an idea for a forest village tileset that used multiple tileset components. Just to clarify that last point; RPG Maker MV uses tilesets composed of multiple pieces: A1, A2, A3, A4, A5, B, C, D, E. You don’t need every component slot filled, but each tile designation has a specific purpose. A1 deals with animated tiles such as water or lava; A2 handles ground tiles; A3 and A4 are walls and roofs, and A5 is what’s termed as “normal”. It handles things that aren’t autotiles, but that can seamlessly mesh with them. (Autotiling creates a seamless patch of tiles, which is helpful for water and ground tiles). B to E are all details, that have no special effects and just look pretty (although you can event them to do stuff). Now, as you can see from the pictures, the VX Ace one is surrounded by actual woodland, whereas the MV one is surrounded by walls. Personally, the VX Ace sample looks nicer to me (write your opinion down in the comments!).
I started by using MV’s “Regions” system to create a rough guide to the map layout. Regions have many uses for programming and gameplay, but for now I’m gonna use it as a kind of painting by numbers guide to mapping. It also allows me to play around with layout without committing to any particular tileset or art style.
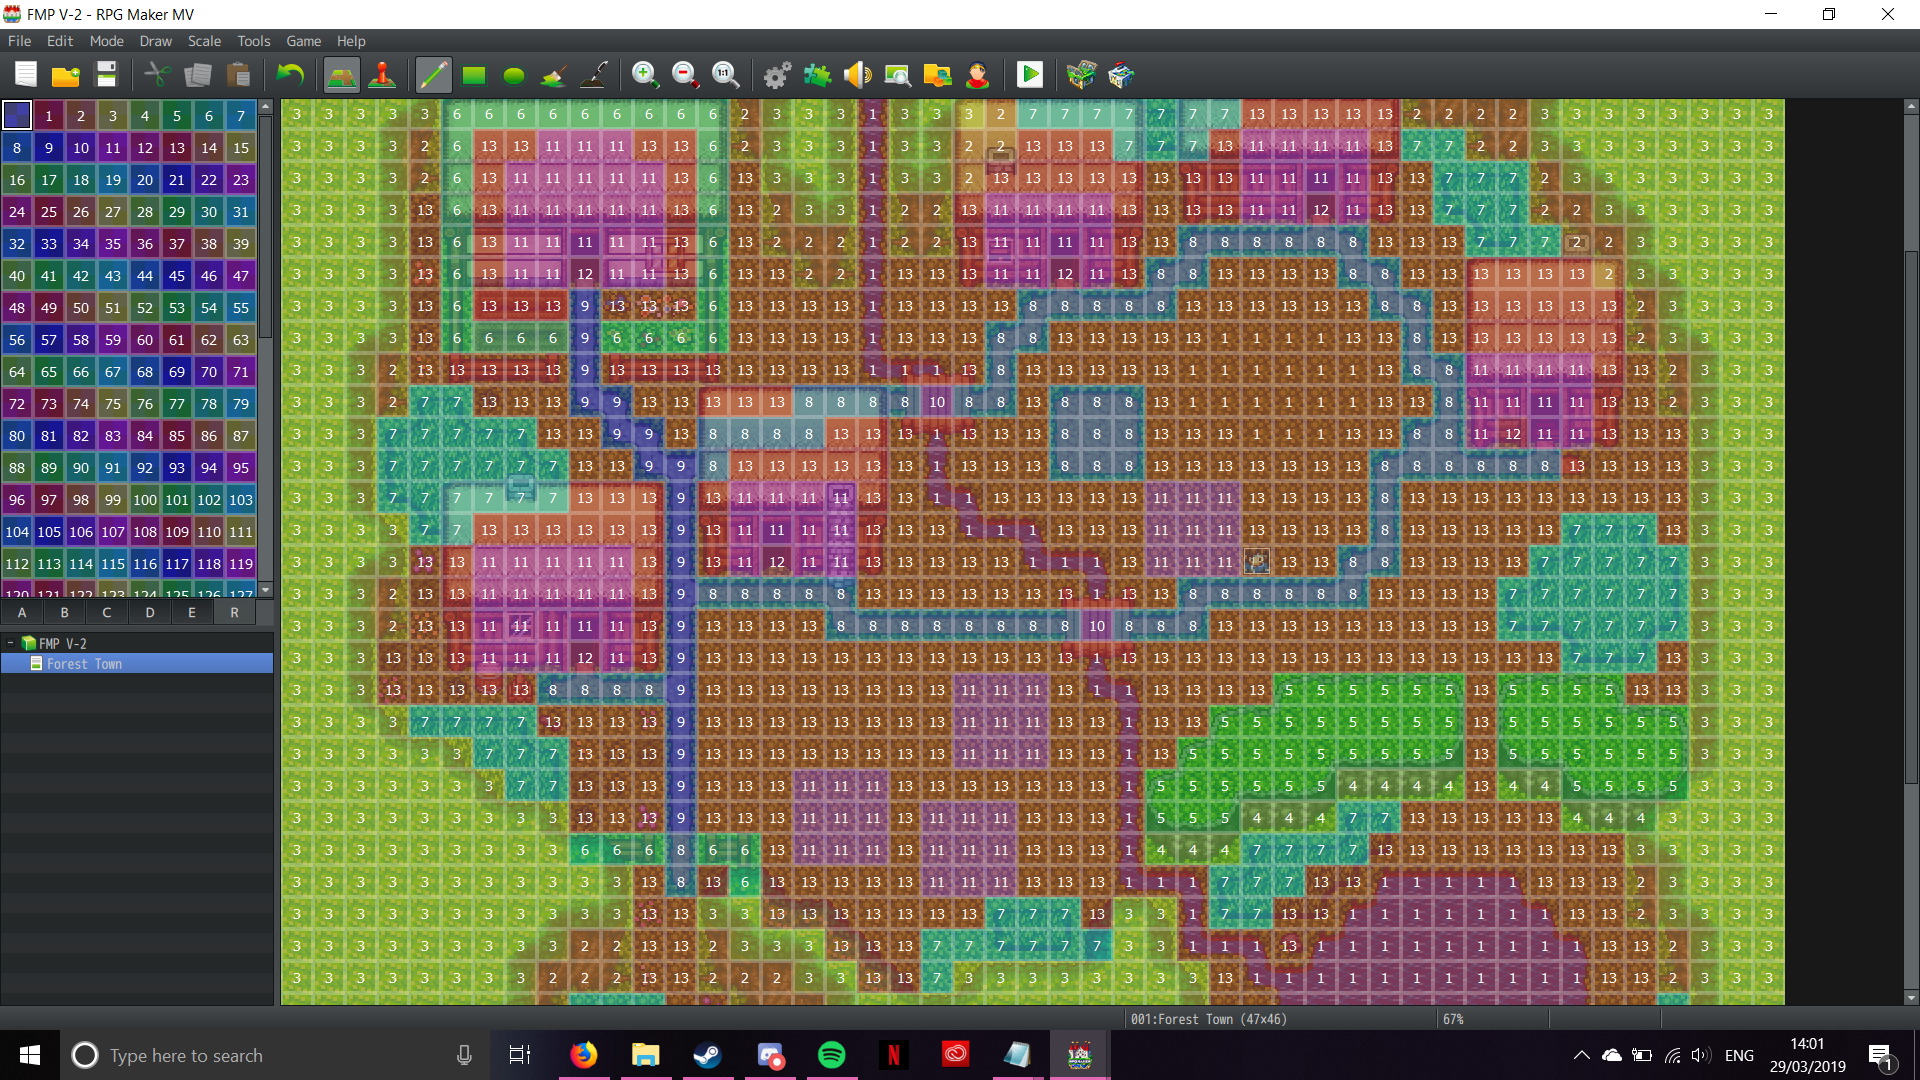
The image above shows the region map when I was about half-way through remapping. Each particular Region has a numerical designation, which I then use to say what it represents (kinda like Algebra). Here’s my list of Regions:
Region 1 = Water, Region 2 = Forest (the actual treetrunks), Region 3 = Forest Canopy (the leaves), Region 4 = Cliffs, Region 5 = Clifftops, Region 6 = Fences, Region 7 = Long Grass, Region 8 = Dirt Path, Region 9 = Stone Path, Region 10 = Bridges, Region 11 = Buildings, Region 12 = Doors, Region 13 = Grass/Standard Area Terrain
I generally allocate Region ID’s to specfic map features based on a simple system; A1 type tiles like water always come first, followed by major terrian features (normally A5), and the end one is always the A2 tile that the area is predominantly going to be. The rest just get put togther in whatever order I decide (I know it’s a it messy, but I prefer it that way). Now I can’t stress this enough; THIS IS JUST A GUIDE. I don’t stick hard and fast to the Regions, I just use them as a rough indicator of where things should go.
Now, you may notice that on my WIP, it has two different colours along the path; this is deliberate. The path is part of the A2 tile, and therefore would leave an aggravating border between the two types of path. I found a way around this; Shift-Clicking. Using the Shift-Click when plcing autotiles makes the engine only generate the center of the autotile. I learned this trick from one of Echo’s Tips and Tricks videos, and it’s come in handy a lot. By shift-clicking the tiles where the two types of path touch, it then lets me do the sencod step of the process; by going over the grass around it with the grass auto tile, it’ll re-make the borderline between the two. Doing this, it creates the effect of having a seamless conncetion between two seperate terrain types. Pretty snazzy, huh?
As I was getting towards the end of the re-mapping, I realised something. The map would have an enourmous amount of green around the outside, which would distract the eye, making it difficult to focus on the rest of the map. Luckily for me, I found a tile that creates a darker “second layer” of tree canopy density that makes it much more aesthetically pleasing. I took shots of the map before and after the adjustment; let me know what you think in the comments!:
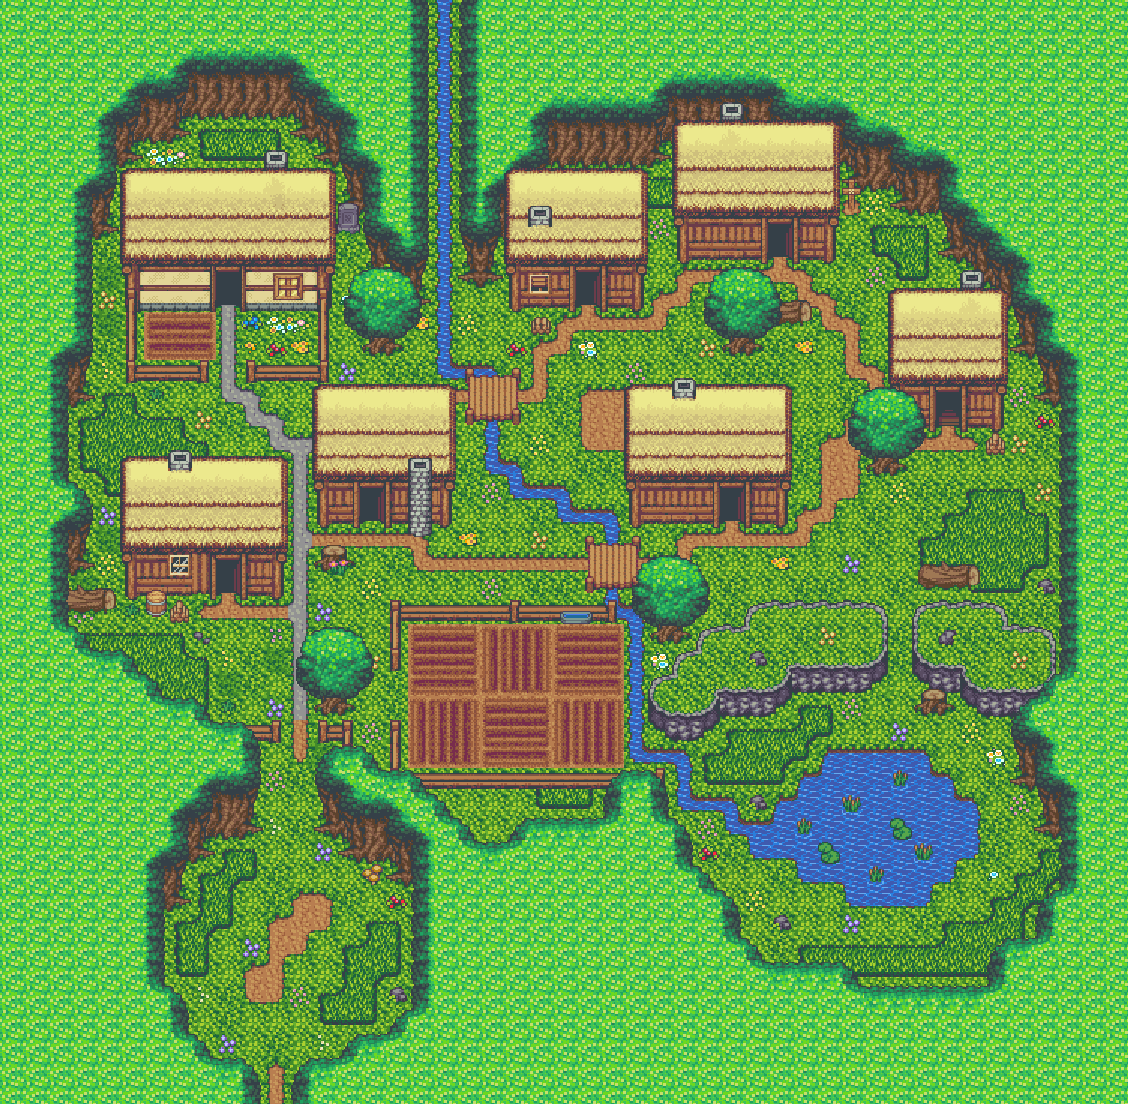
Forest Town map – Before Adjustment 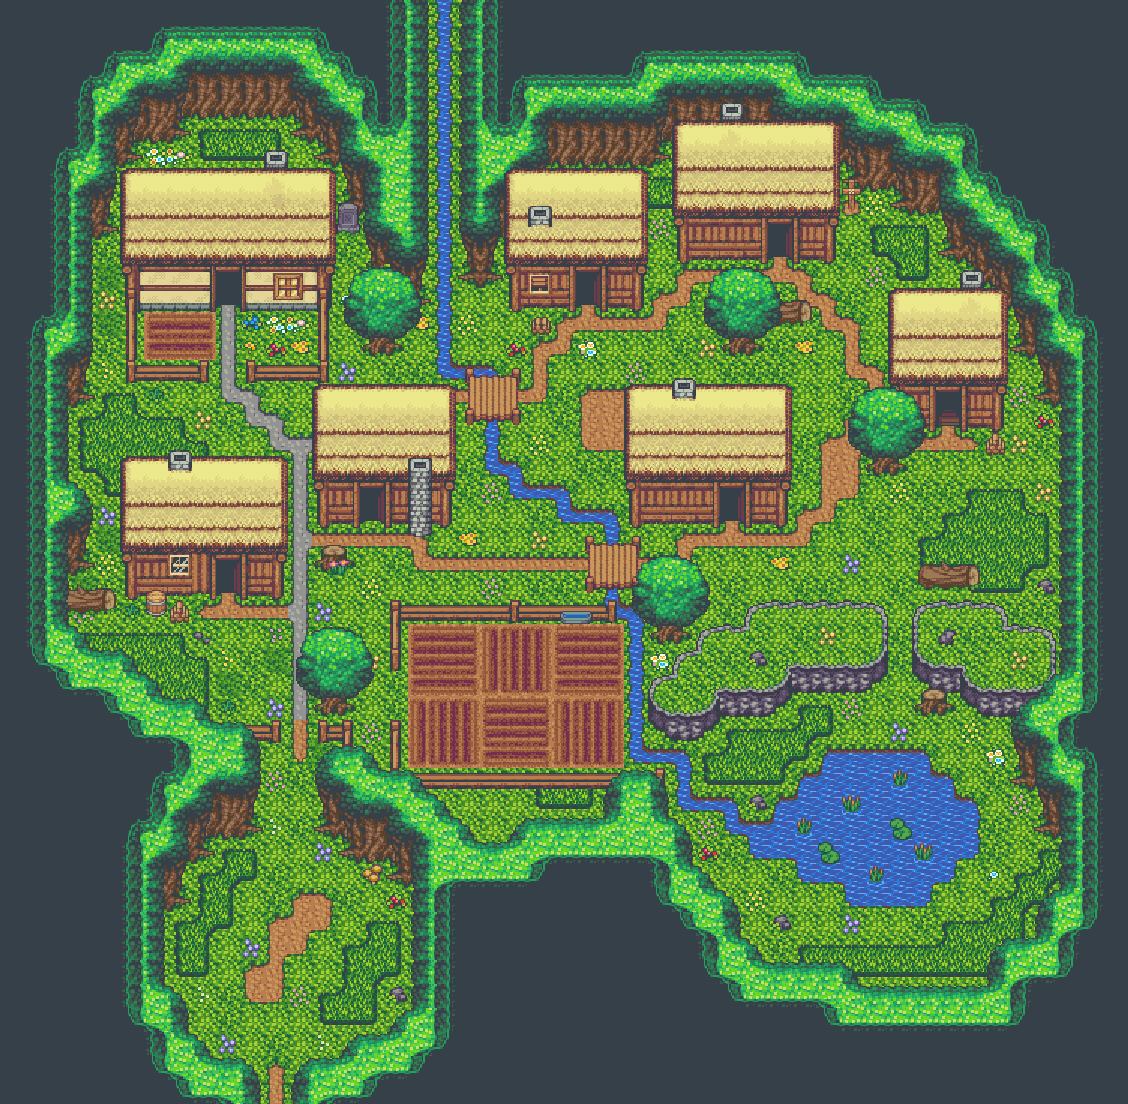
Forest Town map – After Adjustment
You see how the map is brought more into focus with the darker borders? I like it, as it makes looking at the map less of an eyesore. Whilst I would like to show you the full tileset here, I’m afraid I can’t, as it would count as Redistribution (which is prohibited by the licence agreement). It’s a legality that I can’t do anything about, but I guess that’s life.
I’m gonna close now with a little something; I should have an outline of my narrative for you within the next few days. So until then!
